If you're ever getting tshirts made, read on...

In my earlier posts, I put a picture up of my very first customized Munny. For those of you who don't remember, it's in the picture above. Then I decided I wanted a matching shirt promoting my custom Munny. So!
A while back, I had a temporary stint at a Tshirt shop and I was in charge of the garment printer. I learned a hell of a lot in that short time I was there.
There's many different shirt printing methods, but I totally praise the garment printer. I'm even addicted to it. It must've descended from Mt. Olympus upon us lowly peons...ok I jest.
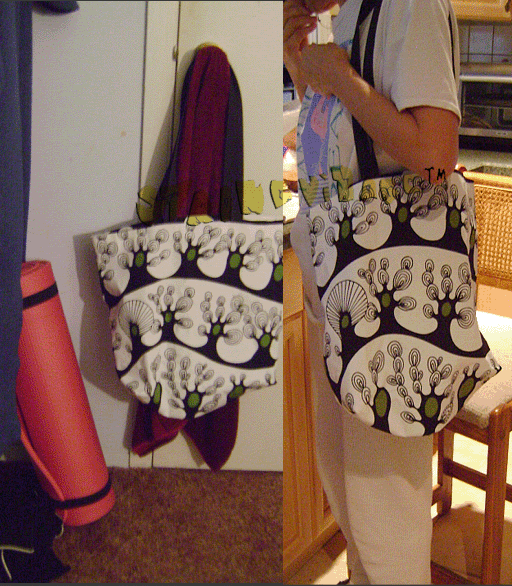
I will show you an example. I finally made that drawing of my custom Munny and ran it through the garment printer. Here's the finished product:
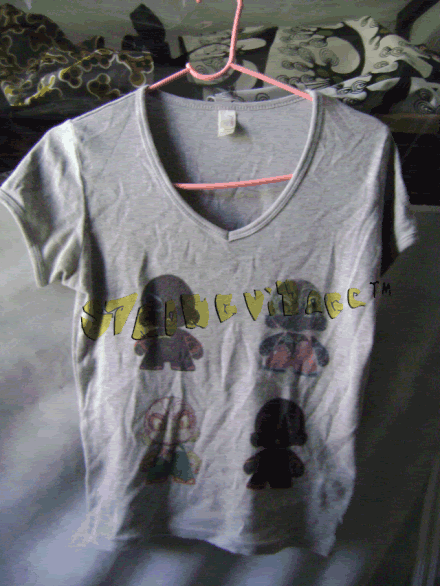
I colored each of the four dolls in different colors so you can get a feel of how they print out.
Here I used an Anvil® V-neck shirt, thin enough for summer wear. The cloth had no problem soaking up the ink perfectly. I slipped the shirt onto the plate, raised it
(there's a lever underneath to raise the plate for shirts; lower it for thicker garments) hit the print button and voilá!
✚A garment printer is like a bigger version of a regular ink-jet printer, only it's specifically made for shirts.
✚Like a regular printer, it uses the black/ cyan/ yellow/ magenta inks.
✚There is no white ink of course, so any white color in the digital file shows up as absent from the printing process.
✚Clearly you can't print on black shirts with it. That's like printing black letters on your home printer on top of black paper.
My only complaint with garment printing is that the machine we used didn't come with any kind of software.
(major FAIL)Software in this case would help VERY MUCH...
We used a Brother® brand which I loved, but the plate doesn't have any guides to help you align the garment so you have no freaking clue where the print area starts and ends. We ended up eye-balling and guessing how to align which should never happen in a
busy-busy-busy shirt shop, especially with pricey machinery!
This is where
pre-made digital shirt templates would've helped big time. Our printer was made to work with Adobe & Corel software, probably more types; I don't know, but it leaves to the imagination where your design will land on the shirt. Not good.
✚You think, that the machine knows how to read your digital drawing and calculate where to begin printing so that the image comes out perfectly. IT DOESN'T.
✚These machines DO NOT HAVE GUIDES. We have to guess where to lign up the garment.
I ruined many tester shirts and a few good ones trying to get it 'just right'. Printouts ended up far too high on the shirt and left a good 1 foot of blank space along the bottom. Or, the image was waaay below the neckline, or too close to the left armpit, hardly centered, blah blah blah...
✚If the last person lowered the plate and forgot to reset it to the standard position, the
ink will smear all over the tshirt or whatever thin garment is loaded on the plate.
✚There's no way of knowing the plate has been lowered until it's too late: the adjustable lever is
underneath the plate.
✚The plate is about, hmm, waist-high. So what are we supposed to do, bend down on our knees each and everytime to check before each run???(DESIGN FAIL)
Customers do not pay for shirts with mistakes on them either. Really not good.
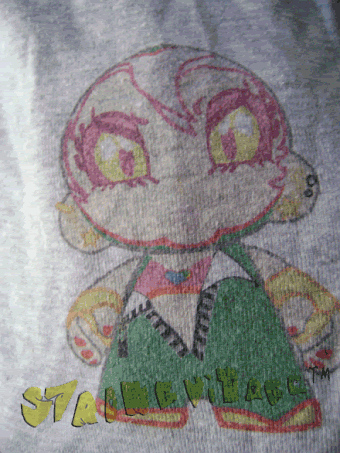
But the print quality is SUPERB. Here's a close-up. Looks like my Munny, right? :
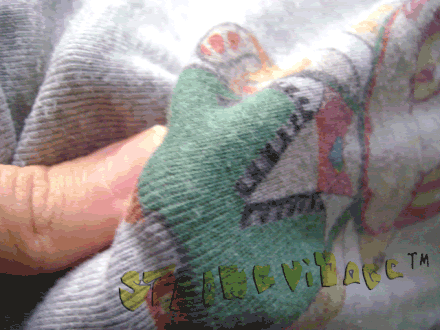
And to the right, a zoom-in of the inked fabric.
The ink soaks through the fabric, leaving it soft and pliable.
Unlike professional screenprinting, where the most popular method involves letting the ink generally sits atop the fabric.
✚That kind of ink is actually a product called Plastisol, which is like hot melted plastic, and colors are later applied on top of that after cooling.
✚Plastisol is most useful for applying white and pastel colors to name a few.
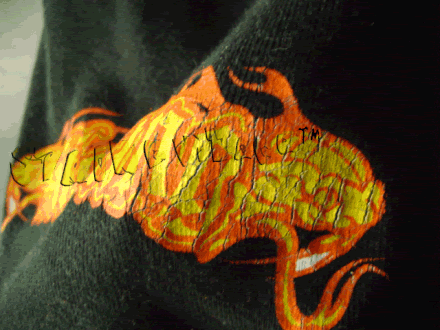
Here's a good example. This shirt I've had since 2003? It's from the Billabong line, it's a Plastisol graphic with the yellow and orange colors tinted over it:
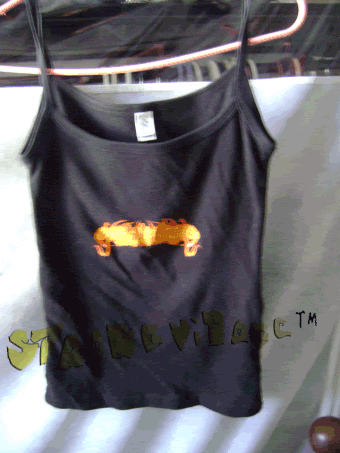
This is an American Apparel® Classic Girl tank.
You can see that the graphic has crackled after a few years and many trips to the laundromat.
I always prefer the garment print 10-1. Color comes out slick and even fine lines show up, but not light colors. Light colors come out looking washed out and faded. For that, I'd go with the Plastisol. But for my very first professionally printed shirt I have to say I did a pretty decent job☻

 About the size of that rolled-up yoga mat.
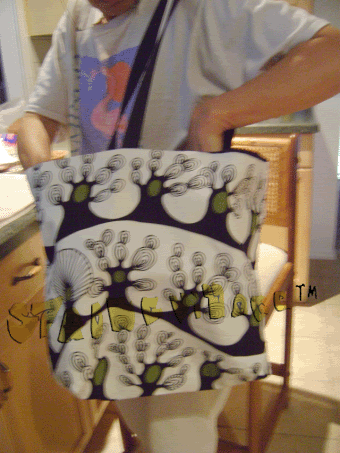 Nothing more that I LOATHE than 2C to see good talent go to waste! I know he'll be reading this post so perhaps you guys out there could urge him to sell these beauties into the marketplace?